
Sound Boards
Sound Files
SparkFun MP3 Trigger
Requirements
- 1 x micro SD card formatted with FAT32 and enough space to hold your sound files
- 1 x Black Female to Female Dupont Wire
- 1 x Red Female to Female Dupont Wire
- 1 x White Female to Female Dupont Wire
The SparkFun MP3 Trigger board needs three wires between the Shadow Master Control board and the Trigger board, Black (ground), Red (5v vin), and White (signal).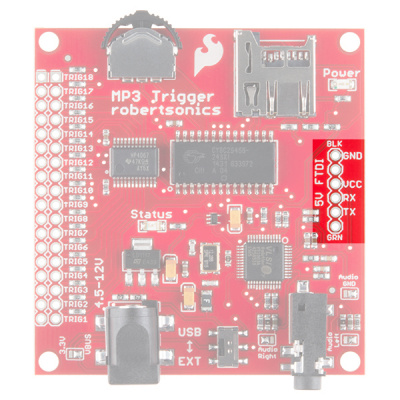
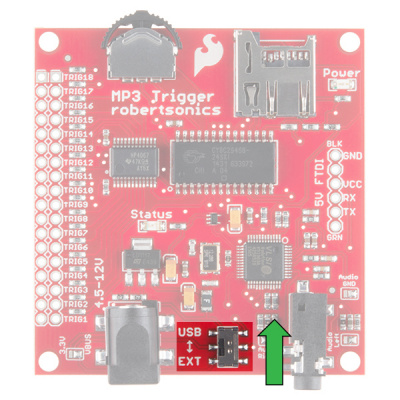
You'll also need to make sure the power selector switch at the bottom or the board is switched to "USB" and not "EXT.
Setting up the sound files
This board uses your average Micro SD card, a large card is not necessary, 1gb to 8 gb is way more than enough for this.
The card should be formatted with FAT32, and the then put your MP3 files onto the SD Card.
The SF board is pretty easy to understand when it comes to how you tell the board what file to play, each file should be renamed to have a 3 digit prefix at the beginning.
Starting with "001" through "018" enables you to order your files and address them, these prefixes also correspond to the 18 trigger pins on the board.
Example Filenames
- 001FileName.mp3 - Without a space
- 002 FileName.mp3 - With a space
Both versions are valid and you can mix formatting.
You won't need to solder to the long row on the left since Shadow is using a Serial connection (via the White wire to RX) and the Shadow code sends the appropriate signal.
The Shadow MSE code already has buttons mapped to certain trigger numbers.
Update the Arduino Sketch
The sketch starts ready for the MDFly board so you'll need to comment out one block of code in the IDE and re-upload the sketch, otherwise you won't get sounds through the trigger board.
Find "Sound Control Settings" near the beginning of the file
// ---------------------------------------------------------------------------------------
//                          Sound Control Settings
// ---------------------------------------------------------------------------------------

#define MP3TxPin 2               // connect this pin to the MP3 Trigger
#define MP3RxPin 8               // This pin isn't used by the sparkfun MP3 trigger, but is used by the MDFly
//#define Sparkfun               // Use the sparkfun MP3 Trigger
#define MDFly                    // Use the MDFly MP3 Player
//#define RogueRMP3              // Use the Rogue RMP3 Player
And uncomment Sparkfun, and comment out MDFly like this
// ---------------------------------------------------------------------------------------
//                          Sound Control Settings
// ---------------------------------------------------------------------------------------

#define MP3TxPin 2               // connect this pin to the MP3 Trigger
#define MP3RxPin 8               // This pin isn't used by the sparkfun MP3 trigger, but is used by the MDFly
#define Sparkfun               // Use the sparkfun MP3 Trigger
//#define MDFly                    // Use the MDFly MP3 Player
//#define RogueRMP3              // Use the Rogue RMP3 Player
Then, find this block under "libraries"
#ifdef MDFly
#include <serMP3.h>
 serMP3 MP3(MP3TxPin, MP3RxPin);
#endif
And comment it out with double forward slashes.
// #ifdef MDFly
// #include <serMP3.h>
// serMP3 MP3(MP3TxPin, MP3RxPin);
// #endif
Then re-upload the sketch ![]() .
.
Connect the Shadow and Trigger boards
Using a 3-wire setup (Black, Red, White) with Female-to-Female Dupont connectors connecting the pins as follows.
Shadow -> Trigger
- GND -> GND (Black)
- 5V -> VCC (Red)
- SIG -> RCX (White)
Plug your speaker into the stereo port on the MP3 Trigger board and not the Shadow board.
MDFly Sound Board
This is the simpler of the two options that I have tried so far since the Shadow board makes it as simple as "plug and play" with the included header that perfectly fits the MDFly sound board. The Arduino Sketch for SHADOW comes pre-configured for this board so no changes are necessary.
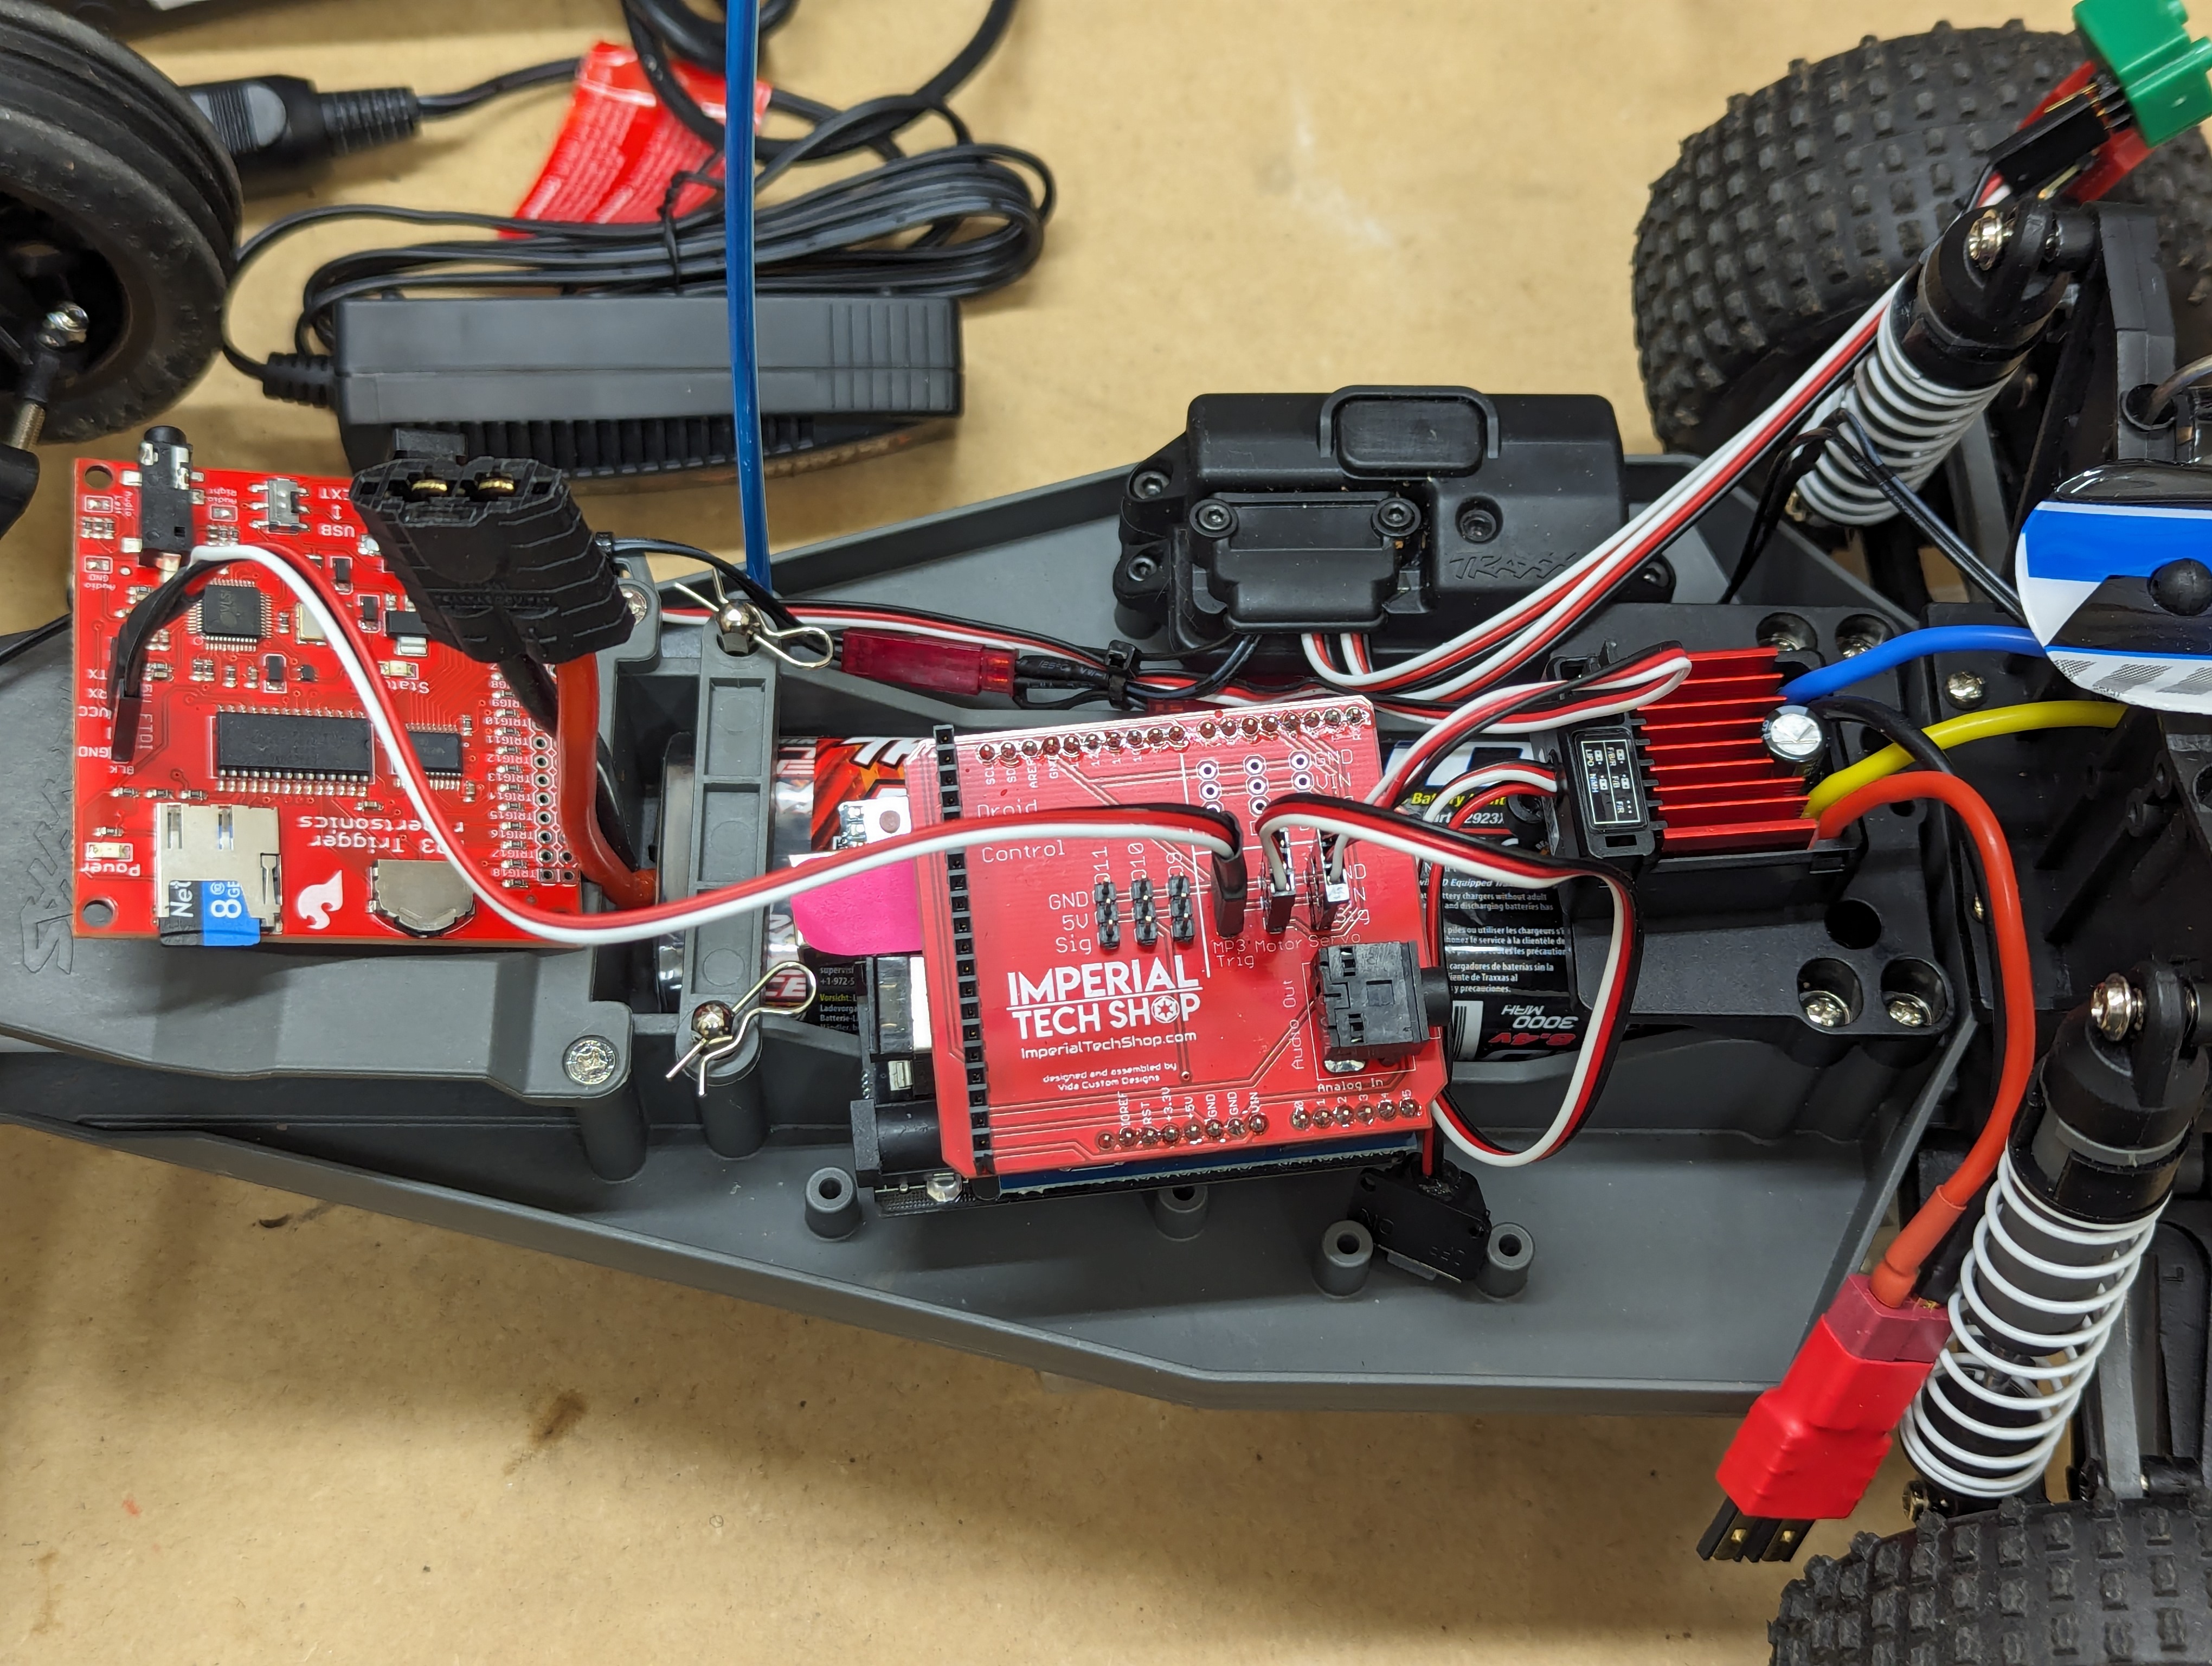
Author Note: This is my current setup
Requirements
- 1 x SD Card (not micro) with enough space and formatted as FAT32. I am using a really old 1 GB Sandisk I had laying around.
Installation
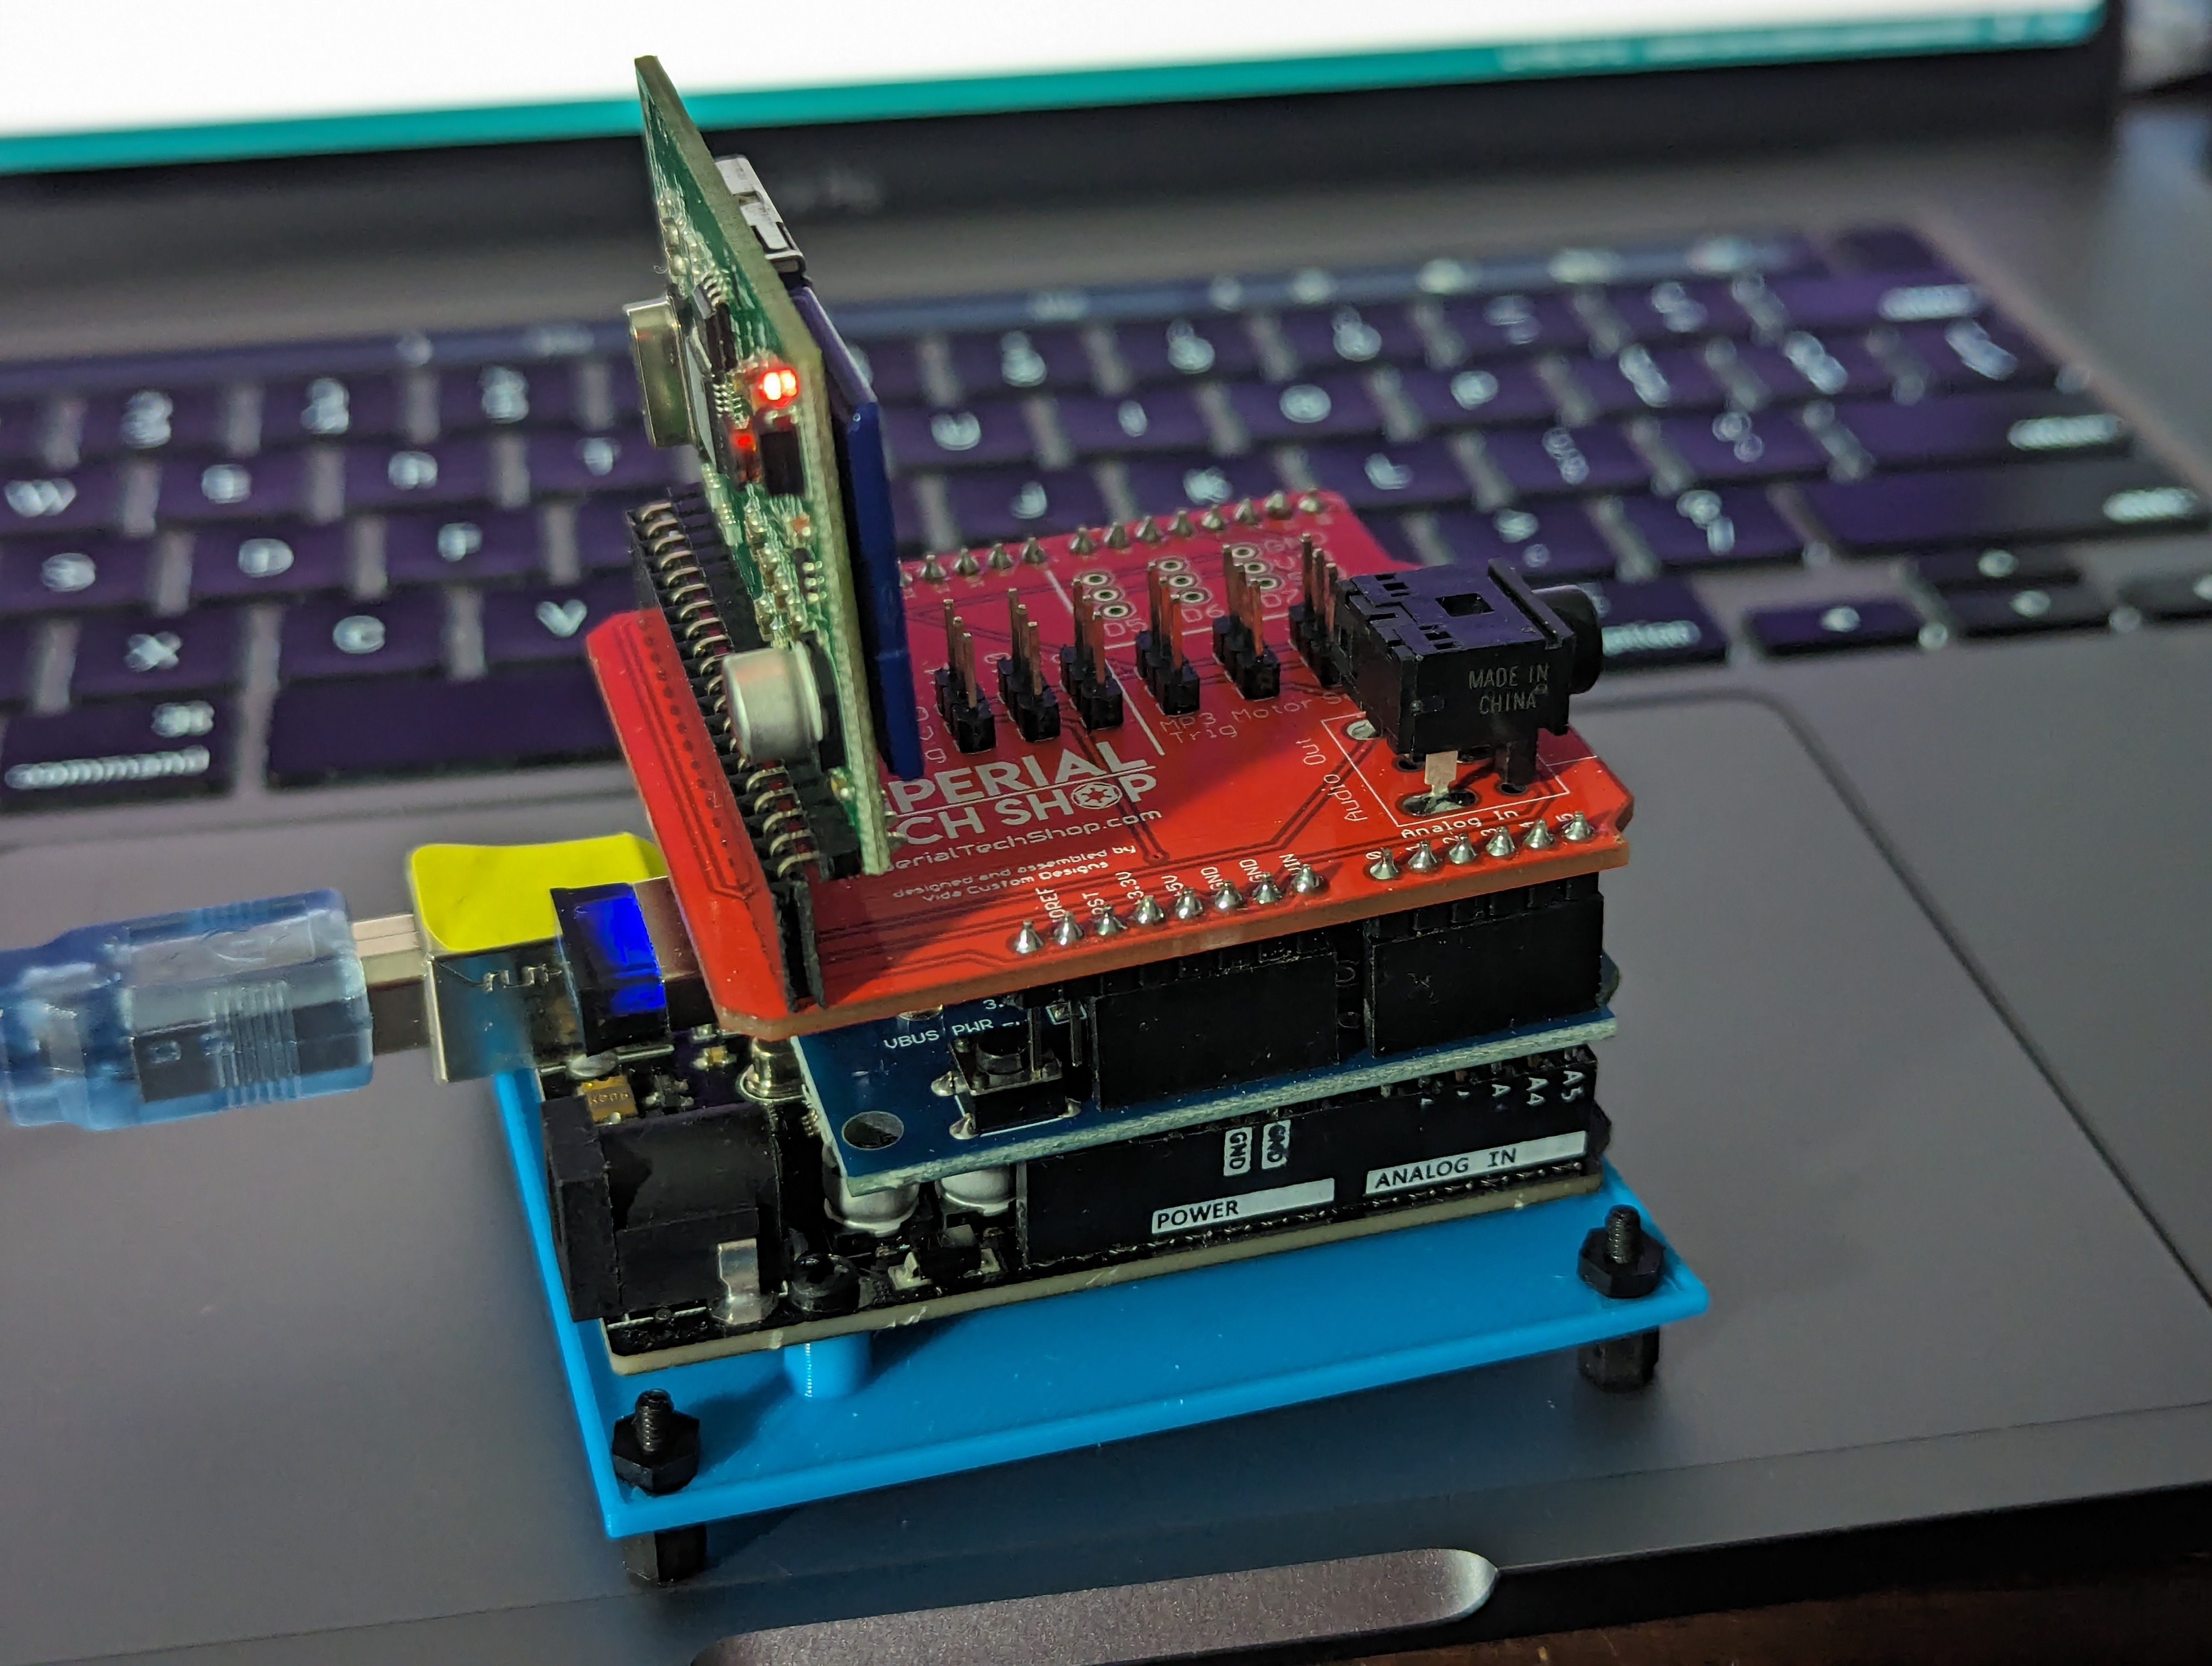
With the Shadow board in front of you with the stereo jack pointing to the right, insert the MDFly board with the SDCard port (bottom) facing the Stereo jack (as below).
Setting up the sound files
Similar to the Sparkfun board, we'll need to rename the files for the MDFly to play the correct sounds for us.
Rename your file to be 3-digits and the extension instead of a prefix based system like the Sparkfun.
Example
- 001.mp3
- 002.mp3
- ...
- 199.mp3
This board supports from 1 to 199 files total but it is severely unlikely you'll need that many.
I'd suggest setting up 7 to 14 files, more is overkill and not possible to trigger properly with one controller.
Button Mapping
- D-pad Up - Sound 001
- D-pad Right - Sound 002
- D-pad Down - Sound 003
- D-pad Left - Random Sound 001-015
- Circle/L2 + D-pad Up - Sound 004
- Cross/L2 + D-pad Right - Sound 005
- Not Available/L2 + D-pad Down - Sound 006
- Not Available/L2 + D-pad Left - Sound 015
- L1 + D-pad Up - Volume Up
- L1 + D-pad Right - Sound 019
- L1 + D-pad Down - Volume Down
- L1 + D-pad Left - Sound 018
Troubleshooting
No Sound
- Common Problems
- Did you load the sound files to an SD Card
- Did you name the files with the appropriate prefixes or names based on the board you are using
- Does your speaker have it's own volume control or Mute
- Is your PS3 move controller paired and connected with your Shadow system.
- Sparkfun
- Make sure you plug the speaker into the MP3 Trigger board and not the Shadow Master
boardboard. - Did you flip the power switch on the board from "EXT" to "USB"
- Did you comment out the MDFly code block shown above.
- Make sure you plug the speaker into the MP3 Trigger board and not the Shadow Master
DidMDFlyyou load the sound files to an SD Card- Did you name the files
withappropriatelythe appropriate prefixes Does your speaker have it's own volume control or Mute?- Is
yourthePS3boardmoveinstalledcontrollerbackwardspaired?and connected with your Shadow system.
Hissing noises
Common Ground Interference
A common problem with electronics like this is "common ground interference", since so many other components are connected to the same ground in the system any of them can add some feedback into the ground which subsequently gets fed into your audio. The simple solution is to use an Audio Isolator like this. ( 
 External Interference