
Setup SHADOW with Arduino IDE
Getting started
So, you have the Arduino (Uno, Mega), USB Host Shield, USB Bluetooth 4.0 dongle, USB-A to USB-Mini wire, and PS3 Move Navigation controller but don't know what to do next ? That's easy just follow along with this guide.
Arduino IDE Setup
Before going further, please make s ure you've downloaded and installed the Arduino IDE .
After it is installed, it's time to grab the SHADOW Arduino Sketch from Github here and then unzip it, the resulting folder will probably be called "SHADOW-master".
- Open the Arduino IDE to set up the config folders and accept any access requests and then close it again.
- Go to the "libraries" folder in the extracted SHADOW-master folder and copy the following library folders into the "Arduino/libraries" folder that the IDE created. This will be in "Documents" (Linux / OSX) or "My Documents" (Windows) by default.
- USB_Host_Shield - Always use this
- MP3Trigger (For the Sparkfun MP3 Trigger)
- serMP3 (For the MdFly MP3 board)
- Start the Arduino IDE, or restart if if you didn't before copying the libraries, to make sure they get loaded.
- Go to file -> open and go into the extracted SHADOW-master folder from earlier. There is a "Shadow" folder underneath, next to the "libraries" folder. Select and open the "Shadow.ino" file.
Now you have set up the IDE and are now prepared to use the Sketch.
Connect to your board
For this step you will need to have assembled your Arduino + USB Shield like below.
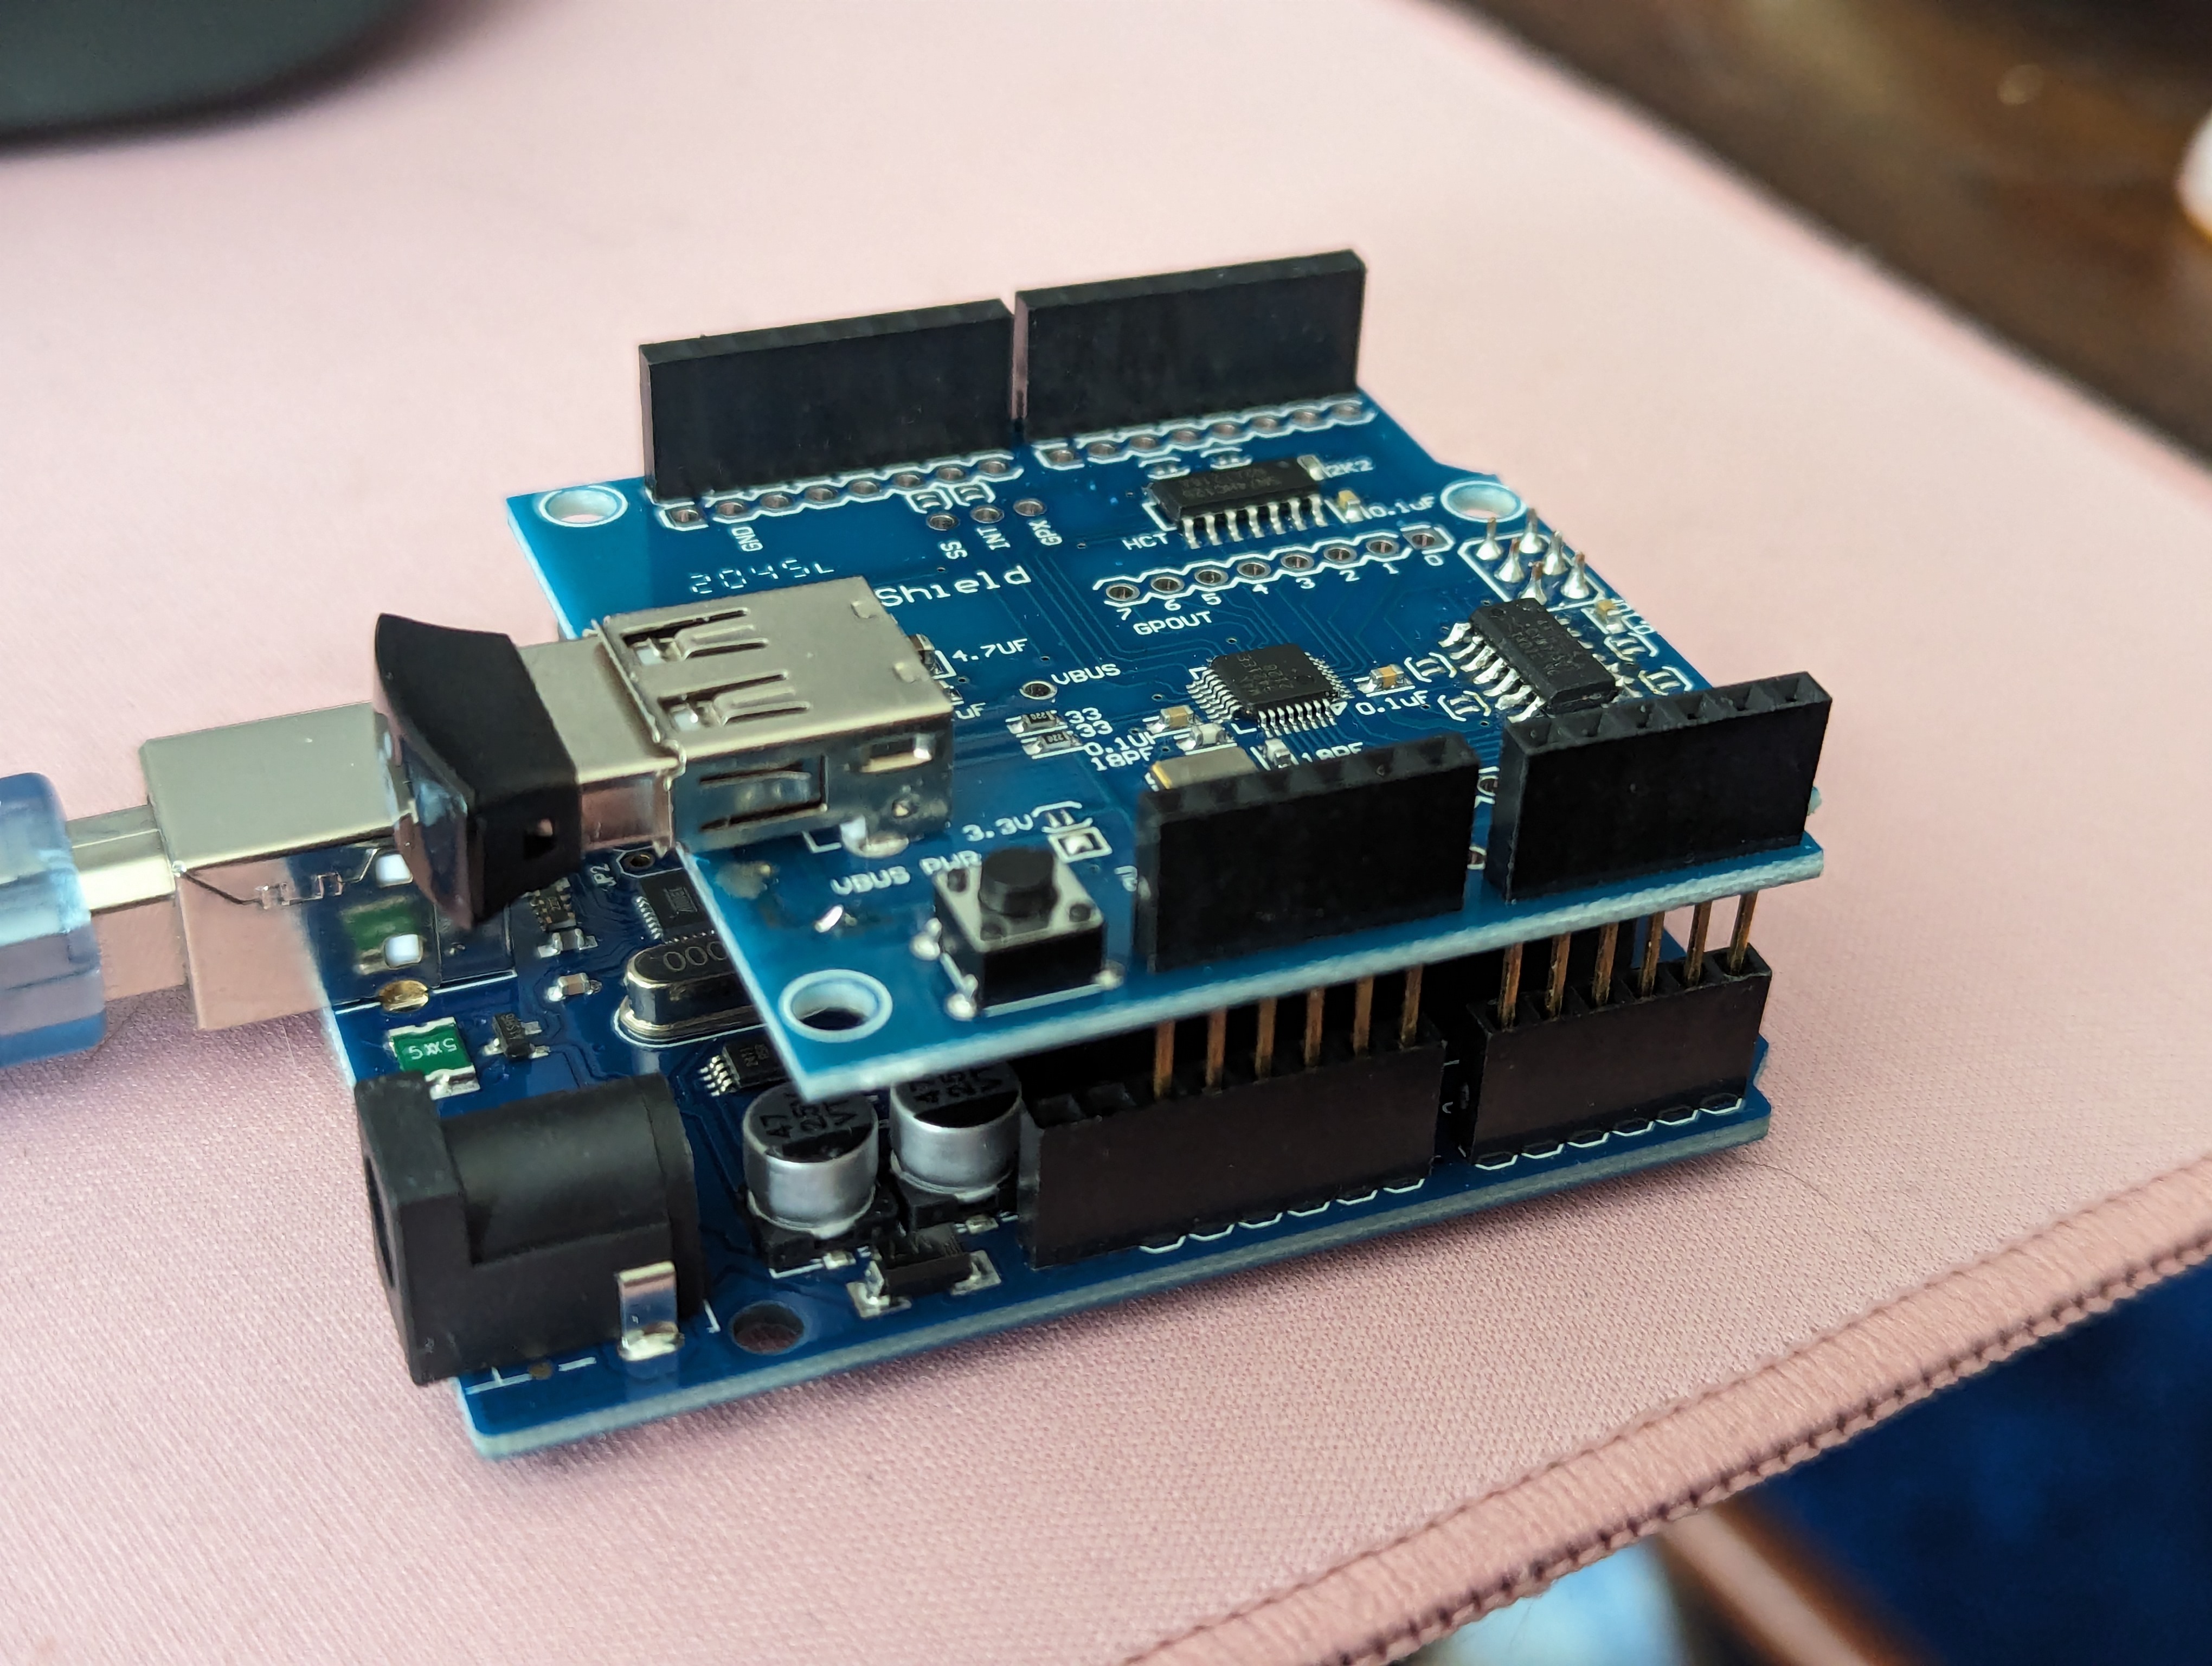
Plug your Arduino into your computer with a USB-A or C to your computer and USB-B to your Arduino cable and go back to your Arduino IDE for the next steps.
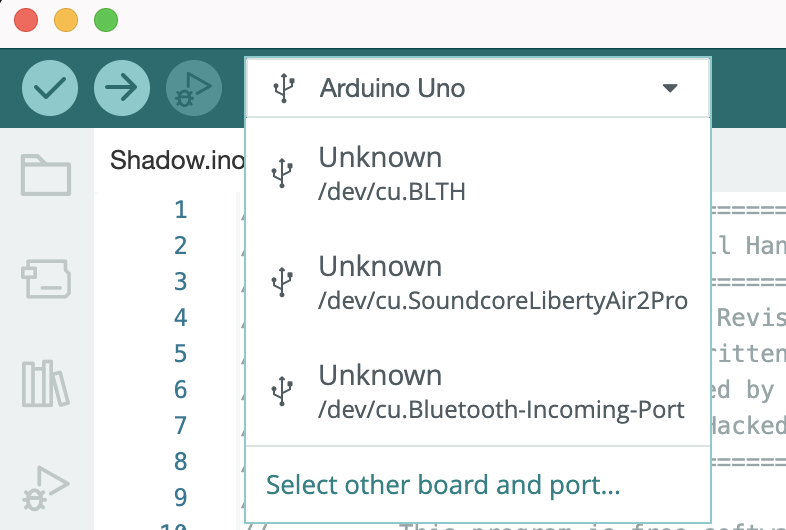
The Arduino IDE may have automatically detected and connected to your Arduino when you connected it. If not, you can manually connect within the IDE.
The dropdown box near the top of the editor (below) will show your options, select the correct connection. If somehow it's not showing the correct Arduino board type, you can now click on Tools -> Board -> Arduino AVR Boards -> select the correct board.
Upload the Sketch
Now that you have connected the board to the IDE, it's time to actually upload the sketch.
For this step, you should have your Arduino connected to the IDE, and the USB Adapter should be plugged into the USB Host Shield.
First, let's use the Verify function to make sure the code is ready to upload to the Arduino.
Click on the round Check mark button ![]() or go to Sketch -> Verify/Compile to verify the Sketch and Libraries are ready for use. If you don't see any errors, all is well!
or go to Sketch -> Verify/Compile to verify the Sketch and Libraries are ready for use. If you don't see any errors, all is well!
Next, set up the IDE so you can see what is happening on your Arduino.
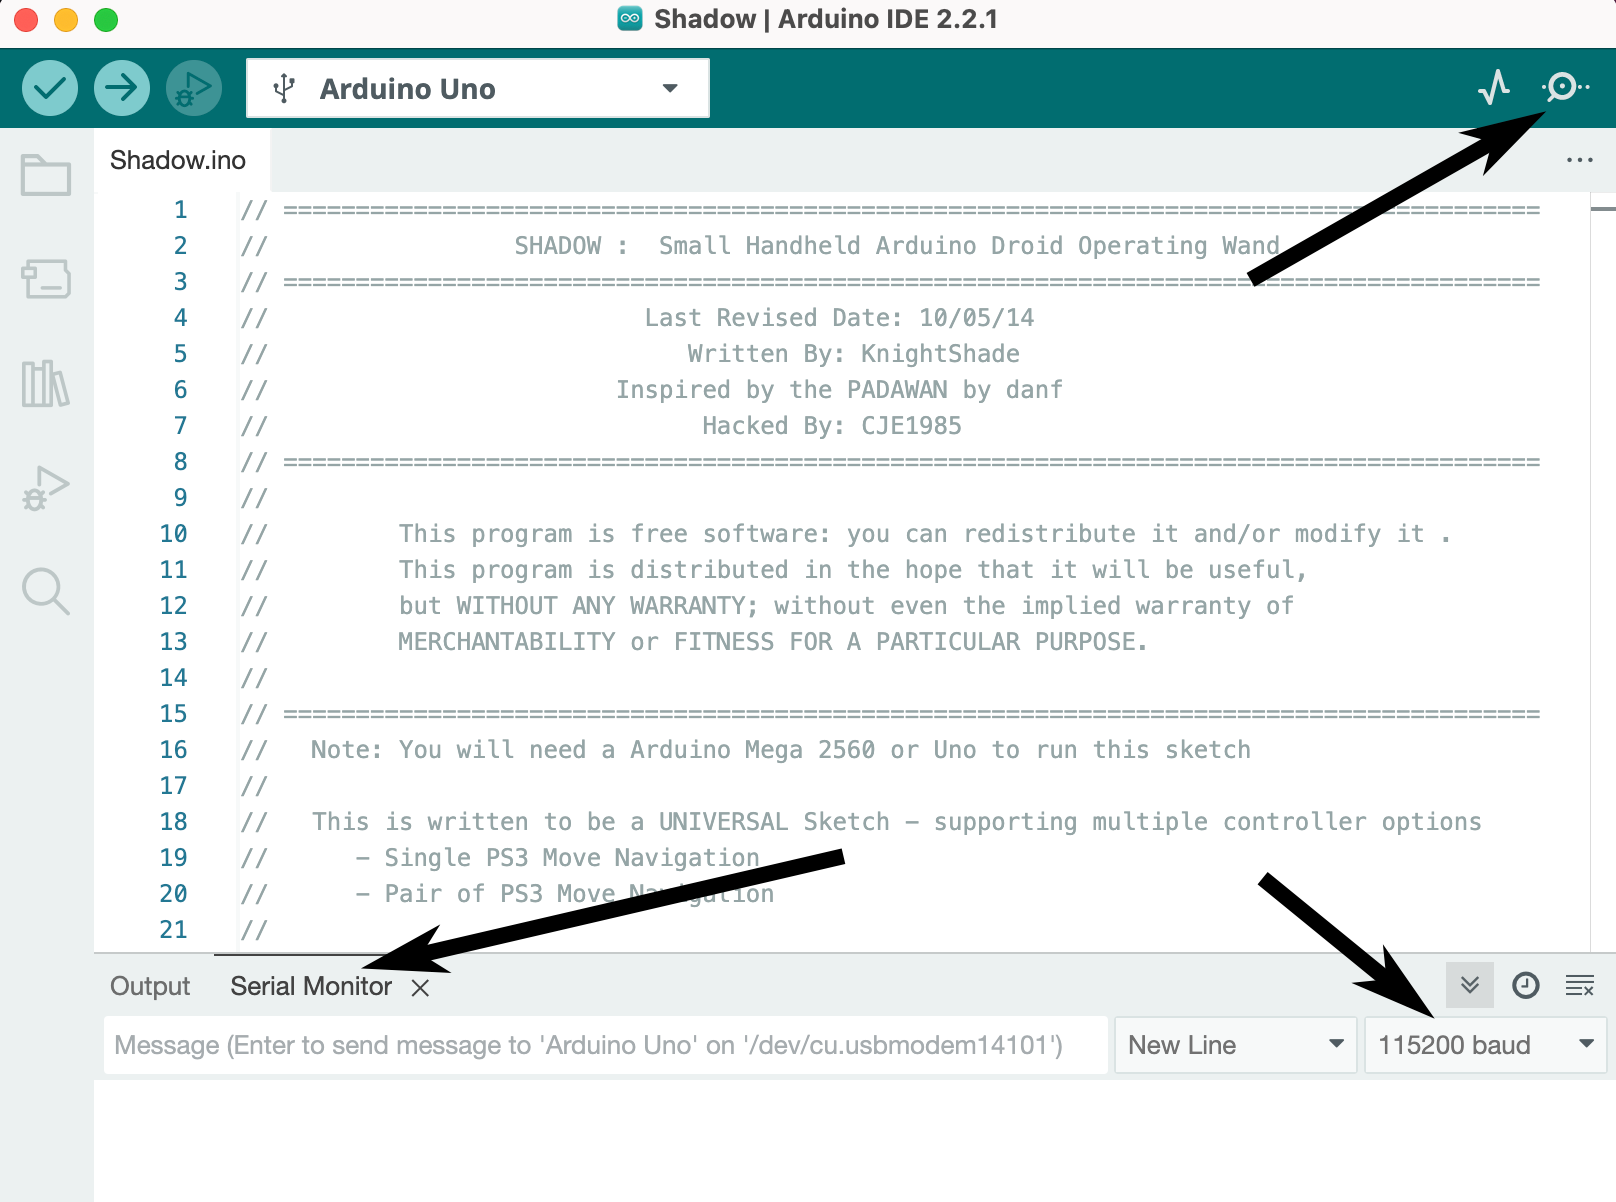
Click on the "Serial Monitor" button ![]() in the upper right and a panel will open at the bottom of the IDE with a "Serial Monitor" tab.
in the upper right and a panel will open at the bottom of the IDE with a "Serial Monitor" tab.
On the right-side of the "Serial Monitor" you need to set the "baud" rate to "115200". If you don't the board and your computer won't be able to talk to each other properly when you upload the Sketch. See below.
Now that you are ready, it's time to upload the sketch.
Click on the round "Upload" button ![]() in the upper left that looks like an arrow pointing right (towards the Arduino).
in the upper left that looks like an arrow pointing right (towards the Arduino).
Now, on to connecting your controller!
Connect your controller
Now for the part you've been waiting for, putting it all together and connecting your controller!
For this section, you'll need the USB to USB-mini cable and PS3 Move controller in addition to your Arduino+Shield.
After uploading the sketch, your "Serial Monitor" should have output that looks like this.
Bluetooth Library Started
MDFly MP3 Initialized
MSE Drive Running
Bluetooth Dongle Initialized
No response to HCI Reset
HCI Reset complete
Write class of device
Local Bluetooth Address: 00:1D:5D:DA:71:1B
Wait For Incoming Connection Request
What comes next is a specific order of operations so please follow them exactly as below.
- Remove the USB Bluetooth Adapter, do not reset or unplug the Arduino board
- Plug the PS3 Move controller into the USB Host Shield
-
Expect similar output in Monitor console
Navigation Controller Connected
Bluetooth Address was set to: 00:1D:5D:DA:71:1B
-
- Unplug the PS3 Move controller
- Plug in the USB Bluetooth Adapter
- Example Monitor output
Bluetooth Dongle Initialized
No response to HCI Reset
HCI Reset complete
Write class of device
Local Bluetooth Address: 00:1D:5D:DA:71:1B
Wait For Incoming Connection Request
- Example Monitor output
- Press the Playstation button in the middle of the controller below the D-Pad.
- The red light on the controller will flash while it's waiting to connect to the Bluetooth adapter.
- The red light will be solid red when it successfully connects to your board.
- Example of successful connection
Navigation Controller Connected
Bluetooth Address was set to: 00:1D:5D:DA:71:1B
Bluetooth Dongle Initialized
No response to HCI Reset
HCI Reset complete
Write class of device
Local Bluetooth Address: 00:1D:5D:DA:71:1B
Wait For Incoming Connection Request
Gamepad is connecting
Incoming Connection Request
Remote Name: Navigation Controller
Connected to Device: 04:76:6E:32:BD:C5
HID Control Incoming Connection Request
HID Control Successfully Configured
HID Interrupt Incoming Connection Request
HID Interrupt Successfully Configured
Wait For Incoming Connection Request
Navigation Controller Enabled
- Grab the Navigation Controller MAC address from the output
- Look for the "Connected to Device:" value like "04:76:6E:32:BD:C5" from the example.
Wait For Incoming Connection Request
Gamepad is connecting
Incoming Connection Request
Remote Name: Navigation Controller
Connected to Device: 04:76:6E:32:BD:C5
- Look for the "Connected to Device:" value like "04:76:6E:32:BD:C5" from the example.
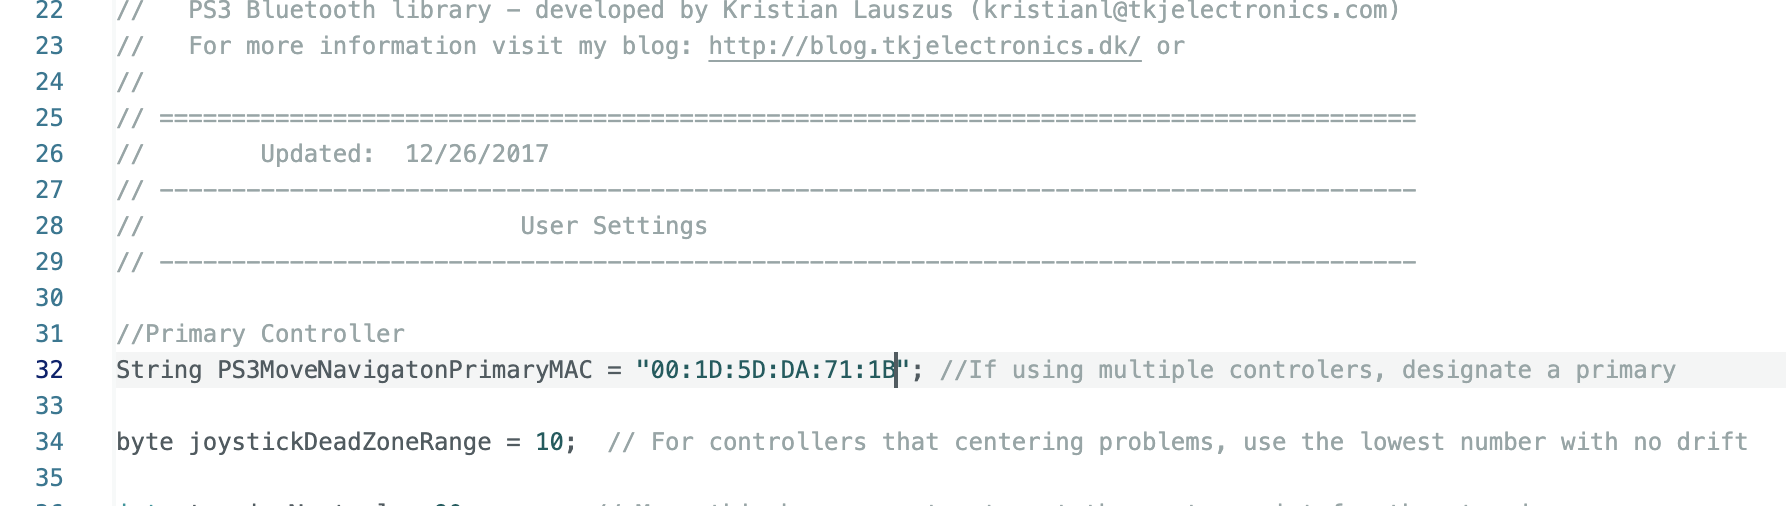
- Go to the IDE text editor and find the "PS3MoveNavigatonPrimaryMAC" variable and replace the value with the Controller MAC address you copied from the output in step 6.
- Save the Sketch (ctrl+s, or cmd+s).
- Upload the updated Sketch to the Arduino using the Upload function
 . This step is important since this tells SHADOW what controller to listen to and accept actions from.
Now your board is ready for final assembly and connecting your board
No Comments